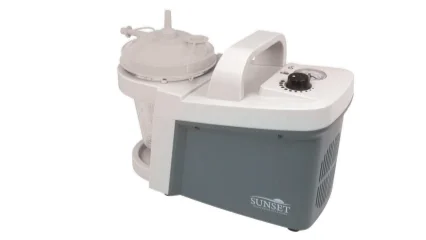
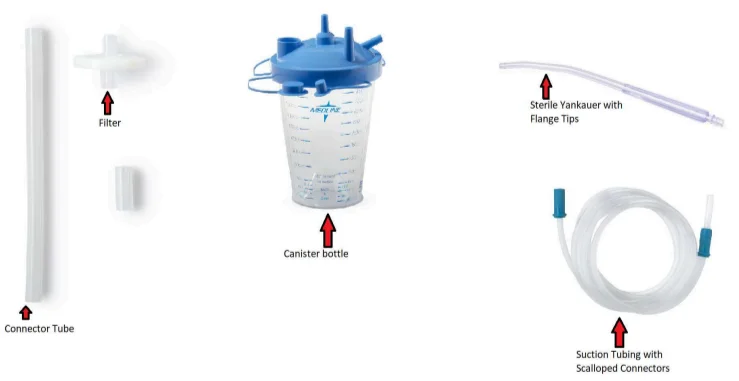
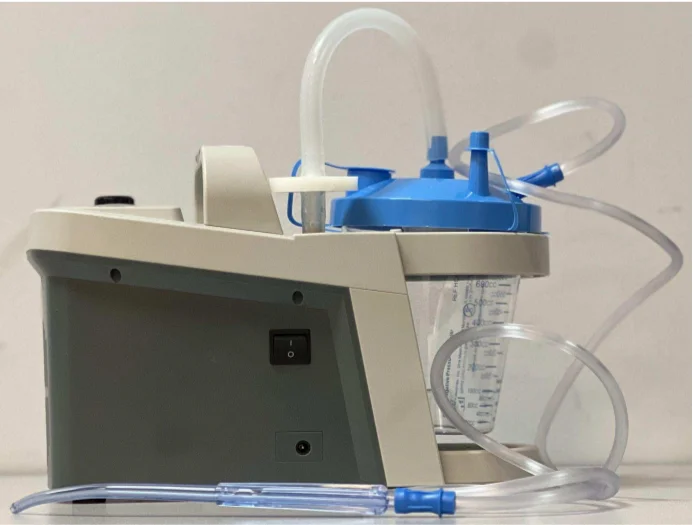
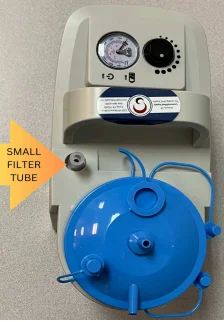
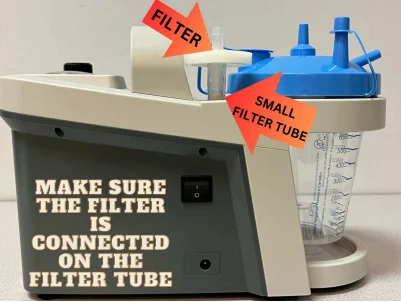
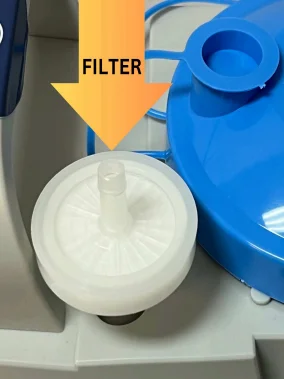
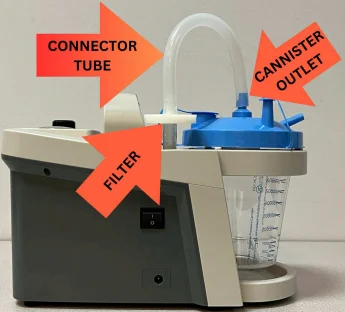
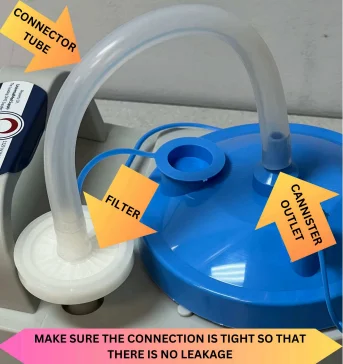
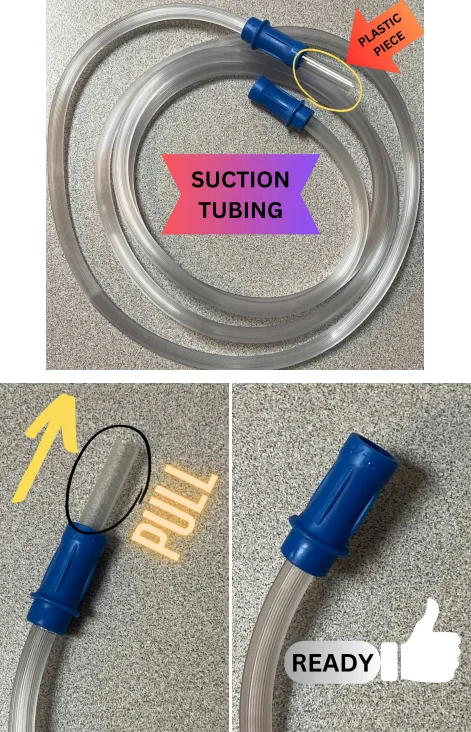
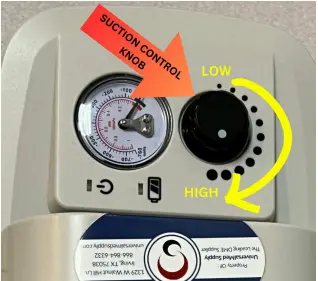
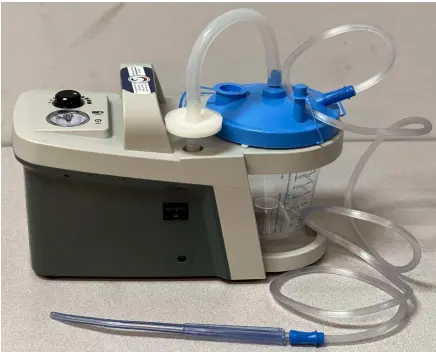
How To Set Up Your Tracheostomy Suction Machine
Suction machines are crucial medical devices that help keep airways clear. They’re often used for tracheostomy care at home, and setting them up might seem daunting at first. This guide will walk you through the process, ensuring your machine is ready to use.
Before you begin, ensure you have all the necessary equipment:
- Suction machine unit (SU100DC)
- Filter kit
- Connector tube
- Suction tubing
- Suction canister
- Power cord


Inspect The machine
Always start by checking your suction machine. Ensure it’s in good working order, the power cord and tubing are damage-free, and the machine is clean and free of debris.


Set up the suction canister:
Place the suction canister securely in its canister holder. Ensure the canister cap is tightly closed to prevent leaks. Keep only the top suction inlet open and the front outlet on the canister bottle closed.


Connect the Filter
Connect the small tube to the outlet on top of the suction machine. Attach the filter to the upper section of this small tube, ensuring all connections are secure


Install the Connector Tubing
Connect one end of the connector tube to the suction outlet on the canister bottle and the other end to the filter.


Connect the Suction Tubing
Remove the small plastic piece from one end of the suction tube. Connect this end to the suction outlet on the canister bottle and the other end to the patient’s suction catheter (Yankauer)


Check the Suction Level
Use the suction control knob on the machine to adjust the suction level to the appropriate setting for the patient

Perform a Suction Test
Test the suction machine by suctioning a small amount of liquid from a container. Check the suction level and adjust as needed

Troubleshooting:
If you encounter issues with your suction machine, here are some troubleshooting tips:
If the machine doesn’t turn on:
- Check the power source and connection.
- Ensure the wall outlet is working.
- Inspect the power cord for damage.
If the motor runs but there’s no suction pressure:
- Check the suction pressure by covering the opening at the top of the machine with your finger. The gauge should read 600mmHg at maximum pressure.
- If the pressure reading is correct, check for leaks in the filter, tubing, connections, or canister.
- If there’s still no suction, contact UniversalMed Supply.
If the suction pressure is low:
- Ensure the power source is connected.
- Increase the pressure using the suction control knob.
- Check all connections for leaks.
- If the motor overheats, turn it off for five minutes and then turn it back on.
- If the problem persists, contact UniversalMed Supply.
Cleaning and Maintenance:
Regular cleaning and maintenance are essential for optimal performance:
- Empty and wash the canister with warm, soapy water, leaving a little water at the bottom to prevent mucus buildup.
- Ensure the filter tubing and canister are clean.
- Keep the battery charged.
- Replace the tubing weekly and outlet filters every two months.
- Every six months, check the white air-filter at the bottom of the machine. Replace it if it turns pale yellow.
FAQs:
Q: What is the warranty on the suction machine?
A: 90 days on the batteries, 1 year on the machine for defects in workmanship and materials.
Q: How do I know if my machine is functioning correctly?
A: Perform regular checks as described in the troubleshooting section. Contact UniversalMed Supply if you notice any issues.
Q: How long does the battery charge and last?
A: The battery fully charges in 8 hours and lasts approximately 50 minutes.
Q: What if my machine stops working suddenly?
A: Check the power source, connections, and tubing. Follow the troubleshooting steps. If the issue persists, contact UniversalMed Supply.
Q: How long can I use the machine continuously?
A: 30 minutes. After that, it needs a 30-minute rest.
Q: Can I adjust the suction pressure?
A: Yes, refer to the troubleshooting section for guidance.
Q: Can I purchase new air filters?
A: Yes, contact UniversalMed Supply for pricing.